In late 2020, I stumbled upon a The Code Book written by Simon Singh. I was intrigued by the book’s discussion of cryptographic history, especially its coverage of the earliest forms of cryptography. The Code Book spends a fair bit of time talking about the Enigma Machine, which was a legendary cipher machine used by the Axis powers during World War II. I was aware of the Enigma Machine before reading The Code Book, but I didn’t really understand the details as to how it worked. As it turns out, its mechanisms weren’t that hard to wrap my head around. I was fixated on the creativity that went into the machine’s design, and how just a few simple components could come together to produce a nearly-unbreakable cipher. (Also, the brilliant work of the Polish to crack the cipher was mind-blowing.) I wasn’t born as an engineer with any mechanical prowess, and so I felt inspired to create a CLI-based version of the Engima I machine.
When choosing the tech stack for this project, I opted to use Java. Mostly because, at the time, I was completing a software engineering co-op at Cogito, and so my day-to-day usage of Java had me confident that I would be able to crank out this project before I lost interest in it. Furthermore, I really wanted to represent the internals of the machine in an object-oriented way. I appreciated the modular nature of the Enigma machine, and how each component has a simple individual function, but the coalescence of their functionalities came together to form something much more complex than the sum of its parts. With my language chosen, I was able to begin the design and implementation of this simulation.
To design the simulation, it’s important to understand how the original machine operated. There are two core components: the plugboard, and the rotors. The ‘magic’ of the Engima machine is that the encryption process doubles over onto itself. That is to say, everything is encrypted one way (in through the plugboard, then through the rotors) and then it’s encrypted the same way, but backwards (through the rotors, then out through the plugboard). The individual specifications of these two components are fairly straight-forward.
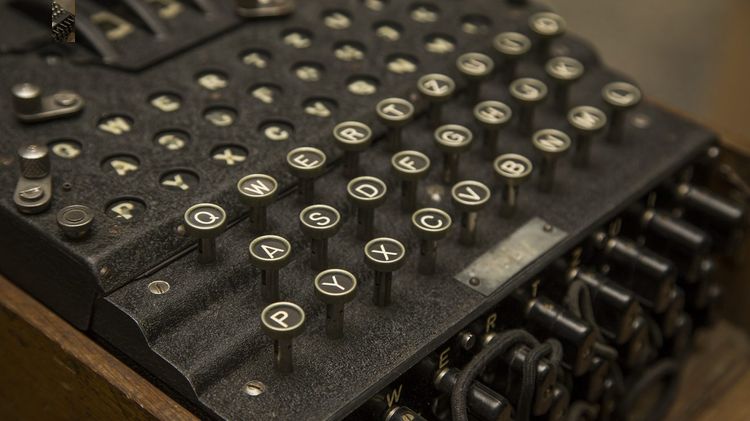
The encryption process flows by inputting individual characters through the machine’s keyboard. Electric current flows from each individual keypress up through the plugboard.
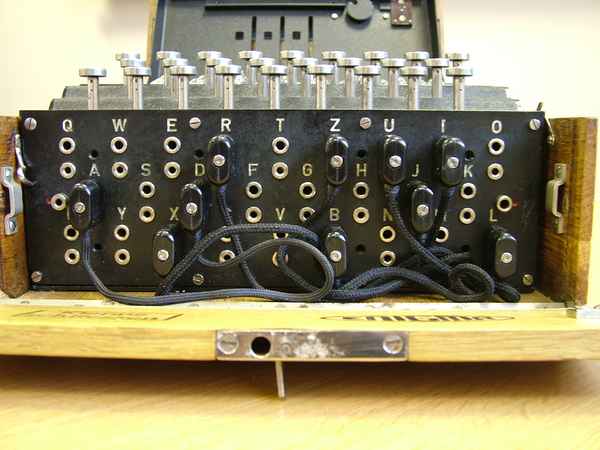
The Enigma's plugboard. Each character connects to one other character.
The plugboard is a straight-forward but ingenuous enchipering component. Characters can be connected to each other with a wire, and this wire establishes a substitution cipher between the two characters. If a user connects the [A, B] pair, an input of A will become B as the current exits the plugboard. There’s nothing especially mind-blowing about how this would work algorithmically. My implementation of the plugboard started by importing an ALPHABET constant, which is a simple ordered list containing the letters of the alphabet. I take the swapped characters from the input file (more on that later) and take note of them as swapped pairs. On each keypress, if a character belongs to a swap pair, we perform this simple substitution:
char before = ALPHABET.get(i);
char after = ALPHABET.get(outs.get(ins.indexOf(i)));
When the electric current is passing through the plugboard for a second time (right before the enciphered character is returned by the machine), we just perform the inverse of this operation:
char before = ALPHABET.get(i);
char after = ALPHABET.get(ins.get(outs.indexOf(i)));
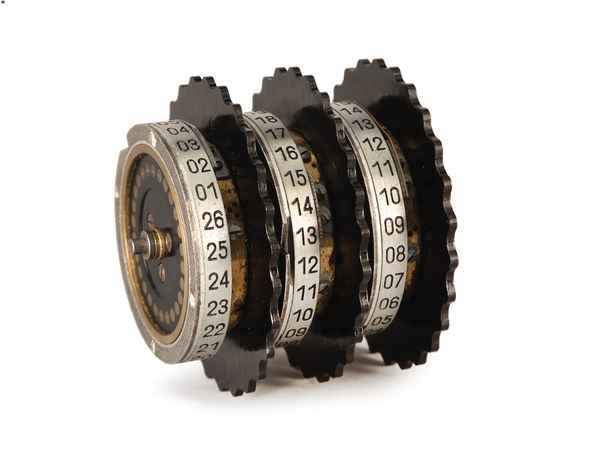
An Enigma rotor. Notice the indexed alphabet wheel, which houses its internal structure and wiring.
The rotor is the bread-and-butter of the Enigma, and it was the main draw of the machine for me. The rotors add a shift cipher layer to the enciphering flow, and they do so in a unique way. The rotors themselves are hardwired to a certain configuration, where one character will always become another character. For instance, the historic Enigma I’s rotor I used the wire configuration EKMFLGDQVZNTOWYHXUSPAIBRCJ. The pin corresponding to ALPHABET[0], or A, would be wired to become E. There were three rotors in the Enigma I, and so as a character’s electric signal exits the plugboard, it is enciphered by the three rotors in rapid succession. The complexity of the rotor configuration comes in the fact that a) the rotors can be oriented in any initial position and b) the rotors ‘step’ on each keypress.
What does this mean exactly? When I described the earlier case of A -> E from rotor I, this would only occur if the rotor were intially placed in a position of 0. There’s a reason why the alphabet of the rotor is represented by alphabetic indices rather than alphabetic characters. The offset of the rotor lends additional complexity to the cipher. If I set a rotor of wire configuration EKMFLGDQVZNTOWYHXUSPAIBRCJ to the offset of 1, then suddenly I have KMFLGDQVZNTOWYHXUSPAIBRCJE. The pin corresponding to A would be wired to become K. Not only can the offset of a rotor be manually set prior to enciphering, but on each keypress, the rotors will ‘step’, or rotate themselves along their wire configuration. So, after A -> K, the rotor will step, and the wire configuration can be represented as MFLGDQVZNTOWYHXUSPAIBRCJEK. If another A input entered rotor I, it would be enciphered in a configuration that was entirely unique from the previous A input.
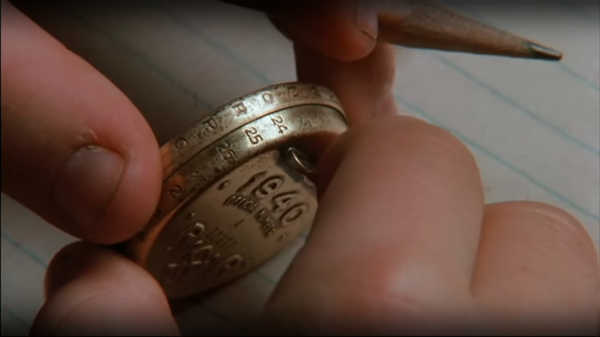
I wonder how many crummy commercials were enciphered by the Enigma I...?Tangent: When you consider that your three hardwired rotors can be set in any order (maybe I place rotor I last, and rotor II first) and that their initial offset can be anywhere from 0 to 26, these layers of subtle variation produced enciphered text that was (nearly) impossible to crack without a key. Rotor machines had existed in cryptography prior to zenith of the Enigma I, but it could be argued that the Engima perfected the cryptographic techniques used by the typical rotor machine. For me, upon first reading about how these rotors shifted along their wire configuration, I could only think of one thing: the Little Orphan Annie Secret Decoder Pin from A Christmas Story. I mentally conceptualized the Enigma as three of those decoder pins stacked on top of each other, feeding each other’s input and output. It made the project a lot more fun to think about!
When we think about translating this rotor functionality to code, we’re benefitted by the fact that these are hardwired configurations. Basically, we just have to keep track of the offset of the wheel and make sure that we’re ‘wrapping around’ the wire configuration as we shift it along itself. I wrote something like this:
int newIndex = i + this.offset;
while (newIndex > 25) {
    newIndex -= 25;
}
char before = ALPHABET.get(i);
char after;
if (this.offset > 0) {
    after = this.wireSpec.get(newIndex - 1);
} else {
    after = this.wireSpec.get(i);
}
Stepping the rotor’s offset is accomplished in a similarly trivial way:
There is some nuance in how the rotor stepping is handled, though. The rotor steps on initial input, so when the first key is pressed, by the time the electrical signal reaches the rotor, it will have already shifted from its initial offset. In addition, we step the rightmost rotor on each keypress, but we only step the middle and leftmost rotors when the alphabet indice for R, F, or W (depending on which rotor is in the middle and left position – remember the wire configurations are hardwired) appear on top of the rotor. This is a seemingly arbitrary character for each rotor, and it stems from the fact that rotor stepping was possible due to physical turnover notches on each rotor.
// Rotate the outermost rotor.
rotors.get(0).rotate();
// Check if any of the other rotors are also rotated.
if(rotors.get(0).getRotor() == 1 && rotors.get(0).getTop() == 'R'
    || rotors.get(0).getRotor() == 2 && rotors.get(0).getTop() == 'F'
    || rotors.get(0).getRotor() == 3 && rotors.get(0).getTop() == 'W') {
        rotors.get(1).rotate();
}
// same process for the other rotor
The only additional thing to say about rotors is that, although we perform this stepping on left-to-right encrypt, the rotors remain stationary when the electrical current passes back through the rotors on its way back to the keyboard display. So right-to-left encryption is straight-forward:
// There is no rotation in left-to-right rotor encryption.
for(int i = rotors.size() - 1; i >= 0; i--) {
    current = rotors.get(i).translate(current);
}
There is one final component of the Enigma that I haven’t talked about yet. On the far left of the machine, past the final rotor, there is a reflector. This reflector takes the output of the final rotor and alters it before returning the current back through all of the rotors again. I thought of the reflector as just being a stationary rotor. For this project, I used the wire specification used by the UKW-B reflector, which was in-use for most of World War II. It uses the wire specification YRUHQSLDPXNGOKMIEBFZCWVJAT.
So, to encrypt a character, the driver function of my simulator executes the following steps:
int alphaIndex = ALPHABET.indexOf(c);
int afterPb = pb.translate(alphaIndex);
int afterRotors = rotorEncrypt(afterPb, rotors);
int afterReflector = reflector.translate(afterRotors);
int afterReverseRotors = reverseRotorEncrypt(afterReflector, rotors);
int afterReversePb = pb.reverseTranslate(afterReverseRotors);
To actually run the Enigma simulator, the user must provide a ‘day key’, just as the original Enigma machine required. The day key describes the machine’s plugboard configuration, rotor order, and rotor offset. The neat thing about the day key of the Enigma was that it allowed for symmetrical encipherment. That is to say, if my machine is set to a certain configuration, and your machine is set to a certain configuration, you can type in my encrypted text to retrieve the decrypted message. The day key comprises the settings of the machine, but also the key to decryption. In the end, irresponsible usage of these day keys resulted in the downfall of the Enigma’s “unbreakable” cipher. (When I first read about day keys, I was amused – it’s just like a config map!)
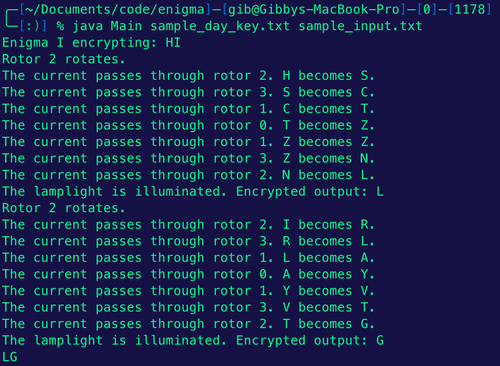
Regarding the user interface, let it be known that I have an irrational infatuation with command-line interfaces. I tend to create things either to satisfy my own intellectual curiosity or to improve my own personal workflows, so I’m trying to get better about prioritizing ‘user experience’ in the abstract. For this project however, I was in a real ‘text-based’ phase. The interface for this simulation is basically just a series of print statements that I scatter at various points of the code, which made is easier for me to see how the machine was ‘working’ at every step of the encryption process. The print statements were also more “narrative-based”, which was partially because I was fixated on Blaseball at the time (I’ll have to write about some of the Blaseball projects that I completed, at some point!).
Here is what the user sees when they try to encrypt the text HI with the following day key:
(A,I) (J,F) (E,M) (Z,X) (W,O) (S,B)
2 3 1
K W O
(Rotor 0 is what I call the reflector in this version of the project.)
I enjoyed working on this project, and it was great fun to implement a simulation while extrapolating requirements from history. That being said, there are a few things that I would do tweak if I opted to pour any additonal time into this:
Testing. 😅 I’m not really sure that what I have works! There are a few different Enigma simulators out there, and I found that when I used the same configuration with the same input text, it would return a different output than my simulator. Writing some tests, while tedious and complicated, would improve the functionality of this simulator.
Refactoring. Even writing this blog post, I’m annoyed by some of the opportunities for refactoring that I can see throughout my code. The most glaring opportunity is to remove the concept of a translate() and reverseTranslate() method, and replace them with a single translate() method that takes n isReverse boolean.
Extending. There are a lot of fun things that could be thrown into the simulator to extend its functionality. I can add more rotor wire specifications, or allow users to input their own. I can add support for a fourth rotor, which the German navy actually started using during the tail-end of the Enigma’s dominance. The simple design of the Enigma allows for a lot of creative modificaftions, and it would be fun to extend my program to use this.